Testing Machine Calibration Guide
Date: July 14, 2026 Categories: Technical Guides & Blog Views: 4029
Testing Machine Calibration Guide: ASTM E4 & ISO 7500-1
Testing machine calibration is the single most critical maintenance activity in any materials testing lab — and the one most commonly neglected. An uncalibrated universal testing machine produces force readings that drift 0.5–3% per year, turning your ISO 9001 audit from a formality into a major non-conformity. This guide covers the two governing standards — ASTM E4 (North America) and ISO 7500-1 (international) — their key differences, how to choose the right calibration grade (Class 0.5 / 1 / 2), a practical calibration frequency framework, the DIY-vs-outsource decision matrix, how to read a calibration certificate without an engineering degree, and a 5-step calibration management program that keeps your universal testing machines audit-ready 365 days a year.
1. Why Calibration Matters (The Real Cost)
2. What Is Testing Machine Calibration?
3. ASTM E4 vs ISO 7500-1: Head-to-Head
4. Calibration Classes: 0.5, 1, or 2?
5. How Often Should You Calibrate?
6. DIY vs Professional Calibration
7. How to Read a Calibration Certificate
8. Intermediate Checks Between Calibrations
9. 5-Step Calibration Management Program
10. Frequently Asked
Why Calibration Matters: The Real Cost of Drift
Here is a scenario that plays out in testing labs every year: a manufacturer ships 50,000 units of a structural component based on "passing" tensile test results. Six months later, field failures start — the material was actually 8% weaker than reported. A third-party investigation traces the problem back to a load cell that had drifted 2.4% out of tolerance over 14 months of uncalibrated operation.
The financial math is brutal. The calibration would have cost approximately $400–$1,200. The recall and liability settlement cost the manufacturer $2.3 million. This is not an edge case — studies from NIST's Office of Weights and Measures document that force measurement drift in universal testing machines follows predictable patterns: 0.5–1% per year for well-maintained electronic load cells, 1–3% per year for hydraulic systems, and up to 5% per year for machines in high-cycle production environments without intermediate verification.
At Derui Testing Equipment, a testing equipment manufacturer serving quality labs worldwide, calibration-related inquiries are among our most frequent technical support requests. The pattern is always the same: a lab that skipped calibration for 18–24 months suddenly fails an audit, discovers the extent of measurement drift, and has to retroactively invalidate months of test data. The cost of calibration is negligible compared to the cost of not calibrating.
| Annual calibration by accredited lab (single UTM, 1 range) | $400–$1,200 |
| Multi-range calibration (3–5 ranges, full UTM verification) | ~$1,500–$3,500 |
| DIY calibration setup (reference load cell + indicator + fixturing) | $5,000–$12,000 (one-time) |
| Cost of invalidating 6 months of test data | Priceless — and career-limiting |
| Average cost of ONE failed audit due to calibration | $15,000–$80,000+ |
Beyond the financial argument, calibration is a regulatory and contractual necessity. ISO 9001:2015 Clause 7.1.5.2 requires that measuring equipment be "calibrated or verified, or both, at specified intervals, or prior to use, against measurement standards traceable to international or national measurement standards." ISO/IEC 17025:2017 goes further — it mandates not just calibration but the establishment of metrological traceability, documented calibration intervals, and intermediate checks between calibrations. If your lab provides test data to customers who rely on it for product certification, skipping calibration is not just a technical risk — it is a contractual breach.
What Is Testing Machine Calibration? (Spoiler: It's Not Just "Checking If It Works")
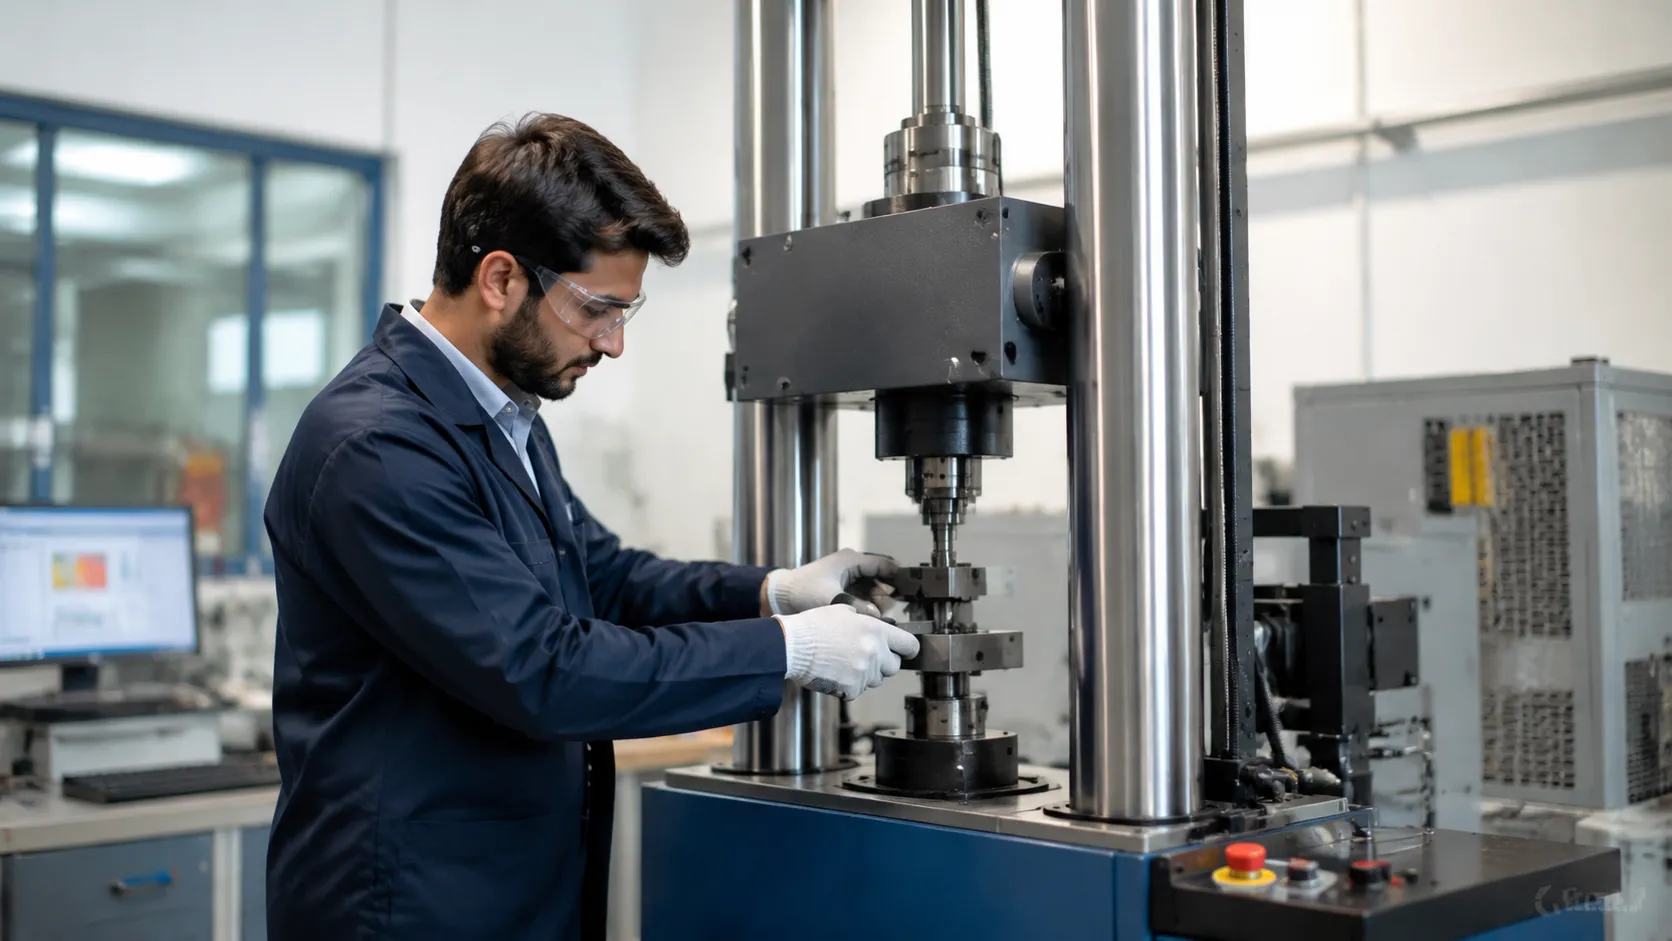
Calibration is the process of comparing a testing machine's force readout against a known reference standard — and then correcting any deviation. It is fundamentally different from verification (which only checks, without correction) and from adjustment (which changes the machine's output without documenting traceability).
The calibration workflow follows a strict sequence:
→
Record Machine Reading (the force value the UTM's indicator displays)
→
Calculate Deviation (machine reading − reference value) ÷ reference value × 100%
→
Compare to Class Limits (Class 0.5: ±0.5%, Class 1: ±1.0%, Class 2: ±2.0%)
→
Apply Correction Factor (if needed) or Adjust Machine
The Two Governing Standards
Testing machine calibration is governed by two international standards — and knowing which one applies to your lab is the first decision you need to make:
ASTM E4
Full title: Standard Practices for Force Calibration and Verification of Testing Machines
Scope: Covers force verification of tension, compression, and universal testing machines. Applies to both electromechanical and hydraulic machines.
Geography: Predominantly North America, but recognized globally in industries following ASTM standards.
Key requirement: Force verification at 5–7 points across the machine's range, two runs (ascending + descending). Machine class assigned based on maximum error found.
ISO 7500-1
Full title: Metallic Materials — Calibration and Verification of Static Uniaxial Testing Machines — Part 1: Tension/Compression Testing Machines
Scope: Specifically addresses tension/compression testing of metallic materials. Covers both force and extensometer verification.
Geography: International standard, mandatory in EU and many Asian markets.
Key requirement: Similar verification points to ASTM E4, but with stricter resolution requirements for the reference instrument and additional requirements for extensometer calibration (ISO 9513).
What Gets Calibrated
A complete testing machine calibration covers more than just the load cell. The core elements are:
| Element | Standard Reference | What's Verified |
| Force Measurement System | ASTM E4 / ISO 7500-1 | Load cell linearity, hysteresis, repeatability, resolution |
| Extensometer | ISO 9513 / ASTM E83 | Strain/displacement measurement accuracy across working range |
| Crosshead Displacement | Per manufacturer spec | Position/speed accuracy (critical for strain-rate-sensitive materials) |
| Alignment | ASTM E1012 | Load string concentricity — off-axis loading can skew force readings by 5–20% |
| Temperature Channel | Per thermocouple type (ASTM E230) | If your machine uses an environmental chamber, temperature sensors must be independently calibrated |
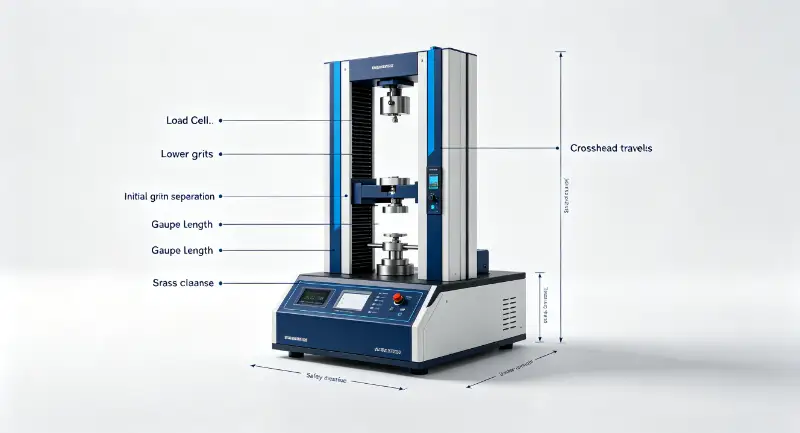
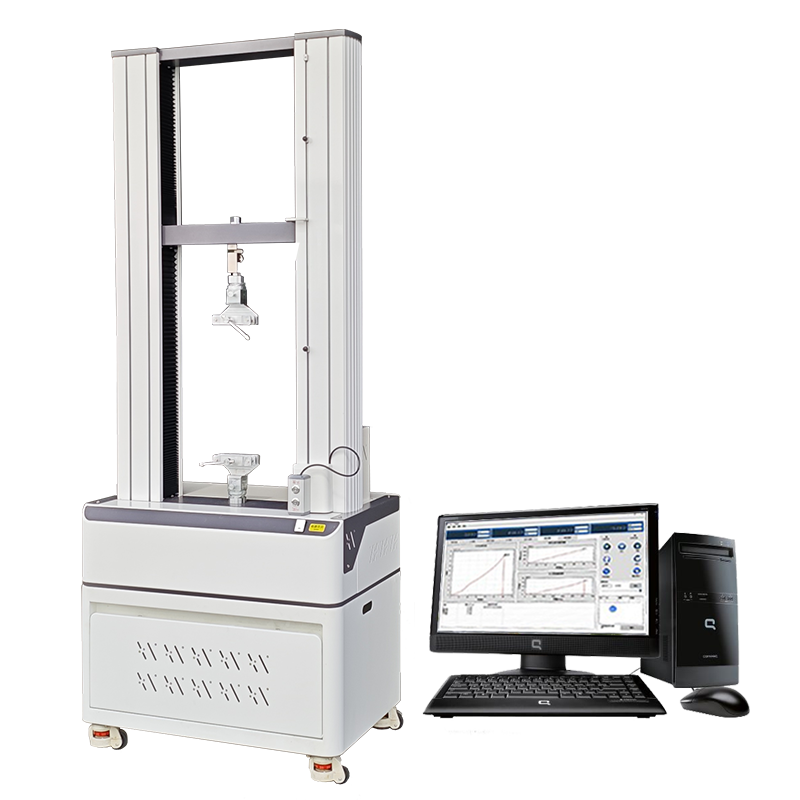
For labs running an electromechanical universal testing machine, the electronic subsystems require special attention. As noted in the comprehensive UTM selection guide, analog-to-digital converter (ADC) linearity, software coefficient verification, and digital filter settings can all introduce systematic errors that traditional dead-weight calibration alone does not detect. This is a nuance covered in WTB-Test's electronic UTM calibration guide — one of the only online resources that addresses electronic-specific calibration points for modern servo-driven testing machines.
ASTM E4 vs ISO 7500-1: The Head-to-Head Comparison
Both standards serve the same purpose — verifying that your testing machine measures force accurately — but their requirements differ in ways that directly affect your calibration process, equipment selection, and audit readiness. Here is the comprehensive comparison that no other guide provides:
| Requirement | ASTM E4 | ISO 7500-1 |
| Verification Points | Minimum 5 points: 10%, 20%, 40%, 60%, 80%, 100% of range (practically 5-7) | Minimum 5 points: 20%, 40%, 60%, 80%, 100% of range. Additional points at low end if machine is used below 20%. |
| Reference Instrument Resolution | Must be capable of reading to 0.1% of the applied force at each verification point | Must resolve to 0.05% of the force range being verified — twice as strict |
| Verification Runs | Two runs minimum: ascending forces (Run 1) and descending forces (Run 2) | Three runs minimum, all ascending. No descending run required. Average of 3 readings at each point. |
| Class Designations | Class A (±1.0%) — no longer common; machines typically verified to "within ±1.0% of reading" | Class 0.5 (±0.5%), Class 1 (±1.0%), Class 2 (±2.0%) |
| Relative Error Calculation | Error = (indicated − applied) × 100 / applied Based on applied force |
Error = (indicated − applied) × 100 / applied Same formula, different acceptance criteria |
| Repeatability Requirement | Difference between two runs ≤ 1.0% of applied force at each point | Range of 3 readings at each point ≤ specified % of mean (Class 0.5: ≤0.5%, Class 1: ≤1.0%, Class 2: ≤2.0%) |
| Extensometer Calibration | Referenced separately (ASTM E83) | Integrated with ISO 9513 reference; crosshead displacement can substitute for strain measurement under specific conditions |
| Scope of Materials | All materials — metals, plastics, composites, textiles, rubber | Primarily metallic materials, though widely adopted for all material types in practice |
Which Standard Should Your Lab Follow?
Your primary customers are in North America, you test non-metallic materials (plastics, composites, textiles), or your quality system references ASTM standards.
You serve European or Asian markets, you hold or seek ISO/IEC 17025 accreditation, you test primarily metallic materials, or your customers require ISO-compliant test reports.
You serve a global customer base. In practice, many testing labs calibrate to ISO 7500-1 and cross-reference ASTM E4 since the core verification methodology is similar. The key difference is documentation and uncertainty budgets.
For labs building their testing capabilities from scratch, our guide on how to build a packaging test lab includes a detailed section on selecting equipment with calibration compliance baked in from day one — far cheaper than retrofitting calibration traceability into an existing machine fleet.
Calibration Classes: What's the Difference Between Class 0.5, 1, and 2?
ISO 7500-1 defines three calibration classes, and choosing the right one for your lab is a business decision — not just a technical one. Higher-class machines carry higher calibration costs but enable you to test materials to tighter tolerances, bid on higher-value contracts, and charge premium test prices.
| Class | Max Error | Typical Applications | Calibration Cost Premium |
| Class 0.5 | ±0.5% | Aerospace fastener testing, medical device verification, certified reference material production, R&D labs publishing peer-reviewed data | +40–60% vs Class 1 |
| Class 1 | ±1.0% | ISO/IEC 17025 accredited labs, automotive supplier testing, construction material certification, most industrial QC labs | Baseline (most common) |
| Class 2 | ±2.0% | Internal QC screening, educational labs, incoming material checks where ±2% tolerance is acceptable to the production process | -20–30% vs Class 1 |
Decision rule: If any customer requires test data traceable to ISO/IEC 17025, calibrate to Class 1 minimum. If you test aerospace, medical, or defense components, calibrate to Class 0.5. Class 2 is acceptable for internal use only — do not use Class 2 machines to generate data that leaves your facility.
Many labs only look at the "as-left" calibration — the state of the machine after the technician adjusts it. The critical data is in the "as-found" state — the condition before adjustment. If your machine was out of tolerance when the technician arrived, every test result since the last calibration is suspect. A proper calibration program requires reviewing as-found data and conducting a risk assessment on prior results when deviations are found. ISO/IEC 17025 accredited labs are explicitly required to do this — it is one of the most common audit findings.
For labs running universal testing machines across multiple force ranges — which is most labs — it is worth verifying all active ranges, not just the one used most often. The NextGen Material Testing calibration guide provides an excellent discussion of why multi-range calibration matters, particularly for labs that run high-force tensile specimens (200–600 kN range) alongside low-force plastic tests (1–5 kN range) on the same machine. At the low end of a high-capacity load cell, resolution and accuracy degrade naturally — and a calibration at 0.5% of the machine's full capacity reveals whether your UTM can genuinely serve dual duty or needs a second, lower-capacity machine for small specimens.
Calibration Frequency: How Often Is Often Enough?
This is the single most common question we hear at Derui — and the answer is "it depends." What follows is a structured decision framework based on usage, risk, and accreditation requirements.
The Baseline: Annual Calibration
The industry default is annual calibration. This is the minimum requirement in most quality management systems (ISO 9001) and the starting point for ISO/IEC 17025 accredited labs. Annual calibration is sufficient for machines that:
- Are used fewer than 20 hours per week
- Operate in stable environments (temperature controlled, low vibration, clean)
- Have a history of minimal drift between calibrations (<0.3% per year)
- Test non-critical components where a 1% force error does not create safety risk
When to Move to Semi-Annual
Many ISO/IEC 17025 labs calibrate every 6 months for at least their most critical machines. Move to semi-annual calibration when:
- Machine runs >40 hours/week (high-cycle production testing)
- Testing safety-critical components (aerospace, automotive, medical)
- Environmental conditions fluctuate (humidity >70%, temperature swings >5°C)
- Historical data shows drift >0.5% per year between calibrations
- Customer contracts specifically require semi-annual calibration
High-Risk: Quarterly or Monthly
For labs in extreme environments — high-humidity tropical locations, unheated factory floors, mobile testing units — quarterly calibration may be necessary. Hydraulic universal testing machines, in particular, are more sensitive to temperature-induced viscosity changes in hydraulic fluid, which affects force application consistency. A hydraulic UTM in an unconditioned factory in Southeast Asia may need quarterly calibration to maintain ISO 7500-1 Class 1 tolerance. Monthly calibration is rare but appropriate for machines testing flight-critical aerospace components where the cost of calibration is trivial compared to the cost of a false pass.
| Factor | Annual | Semi-Annual | Quarterly |
| Weekly operating hours | <20 h | 20–60 h | >60 h |
| Historical annual drift | <0.3% | 0.3–0.8% | >0.8% |
| Component criticality | Non-safety | Safety-related | Flight-critical |
| Environment control | 23±2°C, 50±5% RH | Moderate swings | Unconditioned |
| Accreditation status | ISO 9001 only | ISO/IEC 17025 | 17025 + customer mandate |
| Machine type | Electromechanical | Hydraulic, well-maintained | Hydraulic, high cycles |
Pro tip: The best calibration frequency is data-driven, not calendar-driven. After 3–4 annual calibrations, you will have enough historical data on your machine's drift rate to justify moving to a longer interval (if drift is consistently low) or a shorter one (if drift approaches the class limit). An auditor will accept a data-driven interval justification far more readily than a blanket "we do it every year because that is what the standard says."
DIY Calibration vs Professional Service: The Make-or-Buy Decision
One of the most consequential calibration decisions a lab makes is whether to calibrate in-house or hire an external accredited calibration service. Both paths are valid — but they serve different lab profiles.
Option A: DIY Calibration (In-House)
| Upfront Investment | $5,000–$12,000 for reference load cell(s) + digital indicator + calibration fixturing. Add $2,000–$4,000 for extensometer calibration equipment. |
| Recurring Cost | Annual recertification of your reference load cell (~$300–$800/year) + technician labor (2–4 hours per machine, 1–4× per year) |
| Break-Even Point | 3–6 machines calibrated annually × $800/machine external cost = break even in ~2–3 years |
| Best For | Labs with 3+ UTMs; labs in remote locations where external calibration services are unavailable or travel costs dominate; labs requiring frequent calibration due to high usage |
| Key Challenge | Your reference load cell must be calibrated by an accredited lab annually to maintain traceability. You are now running a mini calibration lab — with its own quality system and audit trail. |
Option B: Professional Calibration Service (External)
| Cost Per Machine | $400–$1,200 per range (single-range calibration). Multi-range: $1,500–$3,500. On-site service adds $200–$500 travel. |
| Lead Time | On-site: 2–6 weeks scheduling. Ship-to-lab: 1–3 weeks turnaround plus shipping risk. Rush service: 2× price. |
| Best For | Labs with 1–2 machines; ISO/IEC 17025 labs where external calibration by an accredited provider is preferred by auditors; labs without trained calibration technicians on staff |
| Key Challenge | Machine downtime during calibration (1–3 days for on-site, 1–3 weeks for ship-to-lab). Scheduling conflicts with production testing peaks. Finding providers accredited for ISO 7500-1 in your specific force range. |
Q2: Can you afford 2–3 days of machine downtime per calibration event? No → In-house (you calibrate on your schedule).
Q3: Is there an accredited calibration provider within 100 km serving your force range? No → In-house or ship-to-lab.
Q4: Do your customers or auditors accept in-house calibration? (ISO/IEC 17025: yes, if demonstrated competence and traceable references.) No → External. Yes → In-house is viable.
Q5: Is your annual external calibration bill >$5,000? Yes → In-house likely pays back within 2 years.
Note on accreditation: If your lab is ISO/IEC 17025 accredited, your calibration provider (whether internal or external) must demonstrate metrological traceability to SI units through an unbroken chain of calibrations. External providers should be accredited to ISO/IEC 17025 for force calibration. Internal calibration labs must document the same traceability chain. More on this in our guide to ASTM testing standards, which dedicates a full section to the metrological traceability requirements embedded in ASTM test methods.
How to Read a Calibration Certificate (Without an Engineering Degree)
A calibration certificate arrives. It is six pages of tables, uncertainty budgets, and coverage factors. Most lab managers glance at the "Pass" stamp and file it. That is a mistake. Here is what to actually look for — and what matters:
The 6 Fields That Actually Matter
| # | Field | What It Tells You | Red Flags |
| 1 | As-Found Error (%) | How far off your machine was BEFORE the technician touched it. This is the most important number on the certificate. | Any point exceeding the class limit. This means your machine was out of tolerance at that force — and prior test results are suspect. |
| 2 | As-Left Error (%) | Post-adjustment accuracy. Must be within class limits. | Error approaching the class limit (e.g., 0.9% for Class 1) — the machine will likely drift out of tolerance before next calibration. |
| 3 | Measurement Uncertainty (k=2) | The ± range around the error reading. Smaller is better. Combined expanded uncertainty at 95% confidence level. | Uncertainty >1/3 of the class tolerance (e.g., >0.33% for Class 1). Your reference standard is not good enough for the class you are calibrating to. |
| 4 | Repeatability (%) | Variation between runs. High repeatability error = inconsistent machine behavior. | Repeatability >50% of the class limit suggests hydraulic instability, loose fixturing, or electronic noise. |
| 5 | Range Verified | The force range(s) actually calibrated. Must cover your testing range. | Your lab tests at 200 N but calibration only verified from 500 N up. The low end is unverified — and often the least accurate. |
| 6 | Traceability Statement | The unbroken chain linking your machine's calibration to SI units via NIST, NPL, PTB, or other national metrology institute. | Missing or vague traceability statement. ISO/IEC 17025 auditors will flag this immediately. "Calibrated to manufacturer specs" is not traceability. |
What to Do When "As-Found" Shows an Out-of-Tolerance Condition
This is the scenario every lab dreads — and the one most labs handle poorly. When the as-found calibration reveals an out-of-tolerance condition:
- Do not panic. Is it a 0.6% error in Class 1? That is likely a gradual drift. Is it a 15% error? That is likely a component failure. The response differs dramatically.
- Determine the affected period. When was the last passing calibration? All test results between that date and now are potentially affected.
- Assess the risk. If the machine was reading high (over-reporting force), materials that "passed" may actually be weaker than reported — this is the high-risk case. If reading low (under-reporting force), materials that "failed" may have been acceptable — this is a false-reject case, lower safety risk but still a business problem.
- Notify affected customers. For safety-critical components, this is a legal obligation in many jurisdictions.
- Adjust and recalibrate. Document everything.
- Review your calibration interval. If drift exceeded tolerance in 12 months, moving to 6-month calibration is the data-driven response.
This is exactly why modern testing systems with digital calibration tracking and automated drift monitoring are replacing paper-based calibration logs in accredited labs. A machine that alerts you when it is approaching the class limit — not when it has already exceeded it — prevents the entire out-of-tolerance cascade.
Intermediate Checks: The Calibration Gap No One Talks About
ISO/IEC 17025:2017 Clause 6.4.10 requires that "intermediate checks shall be carried out according to a procedure" between formal calibrations. In plain English: you cannot calibrate once a year, ignore the machine for 364 days, and call yourself compliant.
Yet when we audit customer labs at Derui Testing Equipment, intermediate checks are the single most common missing element — ahead of even calibration itself. Here is how to implement them properly:
What an Intermediate Check Looks Like
An intermediate check is not a full calibration. It is a spot-check — a quick verification at 1–3 force points using a stable reference artifact (a check standard) to confirm the machine has not drifted significantly since the last calibration. The key principles:
| Element | Requirement |
| Check Standard | A stable artifact with known force characteristics — typically a proving ring, a dedicated reference load cell, or a spring element. Must be more stable than the machine being checked. Does not need to be calibrated — but it must be stable (repeatable within 0.2% across multiple checks). |
| Frequency | At midpoint between calibrations (e.g., month 6 for annual calibration). For high-risk machines: monthly. For production-critical machines: weekly or even daily at a single force point. |
| Check Points | Minimum 1 point at a force level representative of your typical testing range. Better: 2 points — one low (20% of range) and one high (80% of range). |
| Acceptance Criteria | The check standard reading should not deviate from its established mean by more than your defined interim tolerance — typically 70–80% of the class limit (e.g., ±0.8% for Class 1). If exceeded, move the formal calibration forward. |
| Documentation | Record: date, check standard ID, force points tested, readings, deviation from established mean, pass/fail, technician signature. Keep a control chart (X-bar or I-MR) for long-term trend visibility. |
The Control Chart Advantage
Plotting intermediate check results on a control chart transforms calibration from a reactive activity ("did we drift out?") to a predictive one ("we are trending toward the limit — schedule recalibration before we cross it"). A simple I-MR (Individuals and Moving Range) chart with ±80% of the class limit as the yellow zone and the class limit itself as the red zone tells you at a glance whether your machine is stable, drifting, or in trouble.
The WTB-Test electronic UTM calibration guide covers five specific calibration protection principles — including intermediate check methodology — for electronic testing machines. Their recommendation of establishing a "calibration protection envelope" based on the maximum permissible error of the standard being verified is an excellent framework for labs designing intermediate check procedures from scratch.
Building a Calibration Management Program: 5-Step Checklist
A calibration program that survives an ISO/IEC 17025 audit is not a binder of certificates. It is a living system. Here is the step-by-step build:
Step 1: Create an Equipment Register with Calibration Requirements
For every testing machine in your lab, document: make, model, serial number, force range(s), current class, applicable standard (ASTM E4 / ISO 7500-1), calibration interval, last calibration date, next calibration due date, calibration provider (internal/external), and any special calibration instructions (e.g., "calibrate in tension only at customer request"). This is your master asset list — and it is the first document an auditor will request.
Step 2: Establish Calibration Intervals with Written Justification
Use the decision matrix from Section 5 of this guide. Document your rationale for each machine's interval. If you use annual calibration as a blanket policy, note that you will review after accumulating 3+ years of drift data to determine if adjustment is warranted. This written justification is what separates a thoughtful calibration program from a procedural checkbox.
Step 3: Define and Implement Intermediate Checks
Select check standards, establish baseline readings (10 repetitions by the same operator at each check point), calculate mean and control limits, set frequency (monthly minimum for ISO/IEC 17025), and create a control chart template. The first check after calibration becomes your reference point. The ISO/IEC 17025 requirement for intermediate checks is specific and non-negotiable — do not wait for the auditor to ask about them.
Step 4: Establish a Calibration-Expired Response Procedure
Write a procedure that answers: what happens when a calibration expires before recalibration? What happens when an intermediate check fails? What happens when the as-found calibration shows out-of-tolerance? Define who does the risk assessment, how affected customers are notified, who authorizes the recall of test data, and what corrective actions are required. This procedure is the one that gets tested in a real incident — write it with that in mind.
Step 5: Close the Loop — Annual Management Review
Once per year, review: calibration results for all machines (trends in drift rate), intermediate check control charts (any machines approaching the yellow zone?), calibration-expired incidents (root cause and corrective actions taken), changes in testing scope that require calibration range adjustments (are you now testing at forces below the calibrated range?), and calibration provider performance (on-time delivery, certificate quality, non-conformities). The management review is the difference between a calibration program that works and one that slowly degrades. Document the review — ISO/IEC 17025 requires it.
| Core documents | Equipment register, calibration procedure (SOP), intermediate check procedure, out-of-tolerance response procedure, calibration certificates (filed by machine), control charts, management review minutes |
| Software tools | Calibration management software (GAGEtrak, IndySoft, Fluke MET/CAL) or a well-maintained spreadsheet with calendar reminders — the tool matters less than the discipline of using it |
| Auditor hot buttons | Missing intermediate checks, calibration intervals not justified by data, no out-of-tolerance impact assessment procedure, reference standards not traceable, calibration certificates missing measurement uncertainty |
| Calibration labels | Every calibrated machine needs a visible label showing: machine ID, date calibrated, next calibration due, technician/agency. Electronic equivalents (QR code linking to digital record) are increasingly accepted by auditors. |
An uncalibrated testing machine is a liability, not an asset. Keep your lab audit-ready, your data defensible, and your customers confident — starting with a robust calibration program.
Frequently Asked
| How long does a UTM calibration take? | A single-range calibration by an experienced technician takes 1–2 hours per machine. Multi-range calibration across 3–5 ranges: 3–5 hours. Allow an additional 30 minutes for documentation and labeling. If the machine requires adjustment (not just verification), add 1–2 hours. Ship-to-lab calibration: 1–3 weeks turnaround. |
| What's the difference between calibration, verification, and adjustment? | Calibration = comparing the machine's readings to a traceable reference standard and documenting the deviation (does this machine read correctly?). Verification = confirming the deviation is within specified limits (is it good enough?). Adjustment = physically or electronically correcting the machine's output to bring it within limits. These are three distinct activities — your calibration certificate should clearly state which were performed. |
| Can I calibrate a hydraulic UTM the same way as an electromechanical one? | The calibration standard is the same (ASTM E4 / ISO 7500-1), but the procedure has differences. Hydraulic UTMs require stabilization time after each force step (fluid viscosity and thermal effects), must be calibrated in the orientation they are used (vertical for tension, horizontal may differ), and often need hydraulic pressure verification in addition to force verification. Hydraulic machines also drift more between calibrations due to fluid degradation — intermediate checks are especially important. |
| Do I need to calibrate the extensometer separately? | Yes. Extensometer calibration is governed by ISO 9513 (or ASTM E83) — separate from force calibration. An extensometer that has not been independently calibrated can introduce 5–50% error in strain measurement even when the force channel is perfectly accurate. For ISO/IEC 17025 labs, extensometer calibration is required at the same interval as force calibration. Budget an additional $200–$600 per extensometer for annual calibration. |
| What happens if I miss a calibration deadline? | If the machine was used for testing after the calibration expired, all test results generated during the expired period are subject to an impact assessment. Per ISO/IEC 17025, you must: (1) stop using the machine immediately, (2) conduct a risk assessment on all test data generated since expiration, (3) notify affected customers if the assessment identifies potential impact, (4) perform immediate calibration, and (5) document the incident in your corrective action system. A single missed calibration is a non-conformity but not catastrophic — repeated misses indicate a systemic failure of your calibration management program. |
| Does a brand-new testing machine need calibration? | Yes — and this is a common misconception. A new machine comes with a manufacturer's calibration certificate, but: (1) it was calibrated in the factory, not in your lab environment — installation, shipping vibration, and power supply differences can affect accuracy; (2) most quality systems require calibration after installation before the machine enters service; (3) if you need ISO/IEC 17025 traceability, the factory certificate may not meet the accreditation requirements of your specific lab. Always budget for installation calibration — it is not an optional add-on, it is a prerequisite for putting a new machine into quality service. |
| What reference standards are used to calibrate a testing machine? | The most common reference standard is a calibrated load cell with a digital indicator — typically a strain-gauge-based reference transducer traceable to a national metrology institute (NIST in the US, NPL in the UK, PTB in Germany, NIM in China). Proving rings (mechanical ring dynamometers) are still used for high-force calibration (>1 MN) but are increasingly replaced by reference load cells. The reference standard must have a calibration uncertainty at least 3× smaller than the class tolerance of the machine being calibrated (i.e., reference uncertainty ≤0.17% to calibrate a Class 1 machine). |